This is a super-fast, easy ornament project almost anyone in the family can participate in. It is also a great way to recycle all the burned out lightbulbs collected over the year(s) (start saving in January for this project next year). If you don’t have a stash of burned out bulbs start asking your family, friends and neighbors.

What You’ll Need:
– Old Lightbulbs (normal size)
– Wooden Craft Balls (hardware or craft store)
– Scrap Fabric (for scarves)
– Rafia or Twine
– Wire (baling wire, craft wire, hanger wire – anything you can bend and twist easily)
– Paint (acrylic) & Brushes: White, Black, Orange and any other colours you may want.
– Hot Glue Gun & Glue
Get Each Piece Ready.

1. paint all the light bulbs white up to the silver rim (you don’t need to paint the rim).
2. Paint the wooden balls white.
3. Cut your scrap fabric into scarves. Roughly 1 1/2″ x 10-11″ long. If you tear the fabric along the grain you’ll get a nicer look for your scarf. We used some leftover Christmas themed Cotton. Use anything from linen, cotton fleece, felt or flannel.

4. Cut your wire to about 10-11″ lengths. Loop and twist the ends a little (maybe use pliers to make it easier). You will be using this as your ornament hanger so you could also use ribbon, string or twine for this too, but the wire acts as a stiff backing so I think it works well. If you don’t have any on hand, just improvise with something else you do have.
5. Tie your raffia or twine into large bows.
6. Hot Glue the wooden ball heads of the snowmen to the bottom of the lightbulbs – flat side of the ball glued down.

6. Back to painting. Using the non-brush end of your paint brush(es) – dot the end straight in to the paint and practice making dot faces on paper before you try it on the snowman face and body. You’ll really only need the dotting technique for this unless you decide to get more creative with the body design. I just unscrew the top of the paint and dot my brush-end in the cap because this hardly uses any paint at all. Finish dotting your face, charcoal buttons and dotted snowflake design – make sure your pieces don’t roll. maybe use an empty egg carton to hold everything in place after or during painting.

Assembling the Snowmen.
1. Hot Glue your raffia bow to the wire loops.
2. Hot Glue the raffia and wire loops to the metal rim of the lightbulb with the loop sticking up behind and up above the head of the snowman. Make sure you have enough of a loop for hanging on the tree.
3. Snuggle your scarf pieces around your snowmen. Wrap the scarf around the wire (but not over the raffia bow – just above it) and then to the front of the snowman around his neck. Tie it loosely. If your fabric is finicky or stiff and sticking out too much, you can hot glue little dots on the body to help lay it down more.
That’s it! Enjoy!
Snowmen don’t have to be all white

Original Pattern By: claysmith


Original Pattern By: Wordofmouse


")
Original Pattern By: TweetWhatCarrot


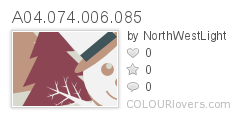
Original Pattern By: NorthWestLight


Original Pattern By: gary_the_snail


Original Pattern By: DandaLuna

Snowman Palettes