What have you done or what are you planning on doing with your wedding dress?
Meet Erin. She’s done a terrific job of transforming her wedding dress into a reusable keeper. Not only has she had it re-structured to be a sexy cocktail dress, but she’s added a unique element that I haven’t seen anyone else do yet–she’s re-coloured and added a hand-painted design.

I had the opportunity to interview Erin a little on her entire dress experience from purchase, to wedding day, to finished cocktail dress.

ME: Where did you get your dress (is it designer?)? Do you mind sharing cost and your experience with buying the original dress?
ERIN: I bought my dress at The Bride Room (www.thebrideroom.com) in Green Hills, Nashville. It’s a Melissa Sweet, and the dress style is called Jillian. I’ll say it was a $$$ on a scale of $=$900 to $$$$$=$9000+. The Bride Room was the first store where I tried on dresses–and they’re AC was broken that day! I originally thought I wanted something with lace and straps or something clean and mermaid shaped. After realizing I looked like an idiot in a soft lacey gown (I’m 5’4 and a slight pear with short legs), Stephanie Arnold (from The Bride Room) pulled some clean fit-and-flares. I wanted no rhinestones/ruffles and when she pulled Jillian, I could immediately tell that it had some lovely architectural details. It was between this and another Melissa Sweet fit-and-flare. I tried dresses on at 2 other shops, and brought my 2 friends to see my favorites at all three. There was a rum pink satin mermaid, a fit-and-flare with a grape vine pattern in the lace overlay, and this one. This was the last dress of the day, and it was the one. I wanted to wear it all day. I had it shipped to a friend in Atlanta to avoid the sales tax, and they decided to order it in a split size because my top half was barely a 0, and my bottom half was a 2. Stephanie rocks for picking out this dress!!

ME: Did you buy the dress thinking that’s what you would do with it after the wedding?
ERIN: I knew I LOVED the dress, and I wanted to do something to it so I could wear it again. I think I decided on altering it/dyeing it maybe a few months before the wedding.
ME: Did you take it to a seamstress? How did you go about planning out the cut of the “new” dress?

ME: What did it cost you to revise the wedding dress?
ERIN: Just under $100.
ME: How do you plan to use the re-done dress?
ERIN: I plan on wearing it to semi-formal parties and maybe a few more weddings. If I pair it with a black cashmere cardigan and the right accessories, it’s toned down. If I pair it with more formal accessories, I can wear it to nicer occasions. The silk maintained its sheen, but the pattern is abstract enough to go either way. Same with the length. Because it’s on the shorter side, it can be fun or luxe. I also still have the Melissa Sweet ruffled bolero that I wore for my wedding to add more formal flair. My my sister-in-law’s wedding, the ceremony was in the afternoon, so the cardigan and fascinator kept it at the right level of formality.
ME: Did you toss the remnants of the rest of the dress? If not, what do you plan on doing with it?
ERIN: I have all of the remnants in a bag. The “butt bow” from the back is a single piece of fabric that’s perfect for a christening blanket. I haven’t researched patterns for a christening gown yet since I don’t plan on needing it for a few more years. I think I saw the tradition of using your wedding gown for a christening gown while researching Irish wedding traditions. I was looking at Irish and Slovenian traditions to see if anything spoke to me as being unique.
Details on the making of the cocktail dress.
Before you go out and decide to simply dye your wedding dress or attempt anything near this stunt, keep in mind that dying the fabrics and lace that make up a wedding dress (silk, taffeta, lace, etc) will all react differently and may not actually hold on to the dye at all unless you use the proper products and techniques. You also don’t want to ruin the actual fabric by trying to dye it.

Erin’s mom (shown painting on Erin’s dress – above) is the artist behind the the colour and design of the finished product. She so kindly shared her exact products, colours and tools used to create the stunning pattern.


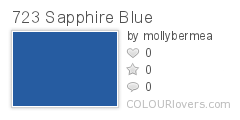
Jacquard Silk Colors: 759 Black, 723 Sapphire Blue and 721 Night Blue
Note: Jacquard products are highly recommended for professional / serious dying. The Dharma Trading Company is one of the best resources for the Jacquard dyes as well as instructional information on proper dying techniques. If you’re new to dying, test your technique’s out with the same fabric before tackling your actual piece.
“Jacquard Silk Colors are easy to use liquid dyes for silk painting that produce rich, transparent colors that allow the translucent nature of the fabric to shine through.” – Dharma Trading Company
You’ll notice in the picture (above) that the design was painted on to the still-white dress. Erin had decided that the dress was still much too white for her to wear to her sister-in-law’s wedding so her mom added the lavender background using a spray bottle. She used the 721 Night Blue diluted down to create a pale purple. All the dye was set with a steam iron (steam set instructions from DharmaTrading.com).
Brushes used: White Taklon Flat Brush #8, Round Brushes #1, #5 and #7; and the Fan Brush
Note: You don’t have to use these exact brushes or brand. There are plenty of resources for brushes. The Dharma Trading Company offers some silk painting brushes, DickBlick.com is also a good resource for artists brushes (you can also get Jaquard Dyes from them). ArtistPaintBrush.com carry’s some of the White Taklon brushes too.

Overall, I was very impressed with the unique way that Erin and her mom re-designed her wedding dress. Making it a usable, wearable piece as well as having plenty of extra pieces left-over for a christening gown, and she could even save additional extras for a daughter or son to incorporate in to their wedding day as you get a lot of material with a wedding dress in most cases! Pieces of the dress could be made in to a ring pillow, grooms tie, brides hairpiece or sewn in to her dress somehow.

Erin writes for her blog, VsualVacation.Blogspot.com about travel, design, art and food. Links to her posts regarding her Wedding Dress Makeover: Post #1, Post #2 and Post #3. All professional photography provided by Holly Jones Photography (a special thanks for our request of photos). All other photos were provided by Erin herself.
Erin is a part of our community too, she is COLOURlover ehlavey – I’d like to give her a big thank you for contributing her time and photos for this post.