Sharing the Love
Created Sep 28, 2007

193,623
Colors
24,961
Palettes
79,887
Patterns
397
Conversations
2,805
Lovers
The un-official FAQ - A group for sharing information about the COLOURlovers - tips and tricks, instructions, questions and answers of all kinds. If you dont know where to start, look in the "index" conversation.
How To embed an image
HOW TO DOWNLOAD AN IMAGE?
Right click ON the image:

WHERE TO UPLOAD AN IMAGE?
1) UPLOADING TO COULORLOVERS
Apart the image you upload in Photocopa (which means you have to make a palette) , the next biggest I found is using a color or pattern page (or using the basic palette editor but you have to make a palette)
>> PHOTOCOPA TUTORIAL PAGE

IMAGE SIZE COMPARAISON
 Example of image uploaded to color page
See image here on the right from this page ->
As you can see, the image you upload to a color page are width: 150px and much more for the height
Above is the same for pattern pages and the basic editor
These below require to make a palettes:
 >> Image uploaded using COPASO:
 palette page
You can see here that with COPASO, height and width have max-size limits - image is tiny!
Images you upload with COPASO are max-width: 85px
 >>Image uploaded using PHOTOCOPA:
 Here on the left is the preview image of this
palette - click on the image to go to the image page and see it in big
Uploaded image was huge: 2000*2800px it has been resized to 375*367px
NB: Images uploaded to PHOTOCOPA must be at least 256 x 256 pixels
PS: ADDING TAGS:
Color pages I use for images are tagged.
eg. Images I use on challenge badges are tagged , 'badge image' - so I can easily search them later! (how do you add tags?)
2) UPLOADING ELSEWHERE & For bigger images
see :List of Free Image Hosts (HotLinking allowed, No Bandwidth Limits…)
I advise imgur.com - this service is very easy to use and has many browser add-ons to make things even easier!
>> Avoid uploading a big image to embed it in small (and vice et versa) - it's a waste of processing and bandwidths
>> Better host an image on the same website (upload to CL to use on CL) - in case one of the servers doesn't work
HOW TO EMBED AN IMAGE
This also enables to make palette tables like this - It's exactly the same for pattern patchworks (rugs, carpets.. how ever you call them)
See also: Step by step how to post photocopa images to groups
1- GET THE DIRECT IMAGE LINK
1a) For an image:
Right click ON the image and get the image address/URL (it will be copied into your virtual clipboard)

Depending the browser the 'Copy image URL' phrase may be a little different.

Use the right click menu function, it's named something like 'Copy link address'
Or open the preview image(click on the text) and copy the image link from your browser's address-bar
2 - PASTE THE IMAGE LINK
2) Go where you want to put your image - click inside the textarea to tell the editor where you want to exactly put your image , (eg: before/ after what word)
... and click on 'Insert image

3) a popup box will appear - paste the image address (URL)

To paste either, use the paste function of your browser or the keyboardshortcut Ctrl+V
4) Click OK and you should see something like this

The image will be visible once you post your comment
PRACTISE: You can try to embed an image here below, use any of the images on this page, then once finished delete your comment, or leave it as is - I'll do it. =)

>> >> Copy paste Embed Image code (size, rotate... to adjust)
HOW TO RESIZE AN IMAGE
Now that you have the image code written, you can change it's size.
All you need to do is to add what you what.
Example to make an image 30px wide, you need to add:
style="width: 30px ; "
which gives :

Example to make an image 10% wide , which 10% of the width of this comment block:
style="width: 10% ; "
which gives :

Example of the code without and with the style option (click to enlarge)

The "style" attribute has many other options - 'style' is not HTML but CSS, a language for layouts, to modify the aspects of things
This page (<-linked) shows other image options, it also has an live editor where you can try your code out.
Above image at it's original size - with no option:

For a computer, each character counts! One space, a dot... is similar to a character.
And at CL, each line break counts! a keystroke line break is equal to a html BR
>>TRY IT OUT LIVE!
>> >> Copy paste Embed Image code (size, rotate... to adjust)
HOW TO PUT 2 BADGES ON THE SAME LINE
IN A COMMENT AT COLOURloversResizing images also enables to put 2 badges side by side, as badges are images
For this example, it maybe easier if you go and get a badge code.
>> Get a badge code - for example this one

In the code you can see :
style="width: 240px; height: 120px; border: 0 none;"
That's the size, this comment block is 2px too narrow for 2 badges!!
(important: with no space between them - a space is several px)
So you need to reduce the width of 1px
and to keep the proportions: also to the height .. but it's simpler to just remove the height and let the computer calculate:
style="width: 239px; "
...and you can also remove the the border: 0 none; when posting at CL - here images have no border by default .
(Good to know because comments here have a max character limit)
USING PERCENTAGES INSTEAD OF PX
As 2 badges just fit on the same line, it means each one is 50% of the available space.
This is nice because they'll always be on the same line even when used with 'reply'
To use percentages:
style="width: 50%;"
It's 50% of the width of it's container.
NB: don't forget to remove the height!
example with 50%:
so when used with reply, the badge will always be 50% of the available width
... even if done many times!
instead of one on each row
NB: don't forget to remove the height!
Or you'll end up with the same height but narrower - like this
Click 'reply' to see the code of the comment here below. I used size: 50%
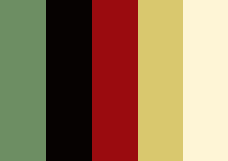

----------------------------------
HOW TO LINK AN IMAGE OR SOME TEXT
OR
You could add the link of a pattern page to a pattern preview like this

(clicking on the image should lead you to the pattern page)
Like for the 'how to embed an image", first get the link you want to add ready in your clipboard (That means copy the link you want to add - as long as you don't copy over it, it'll stay there in your clipboard)
In this example, we're going to add a short link for simplicity, the link to CL, which is
http://www.colourlovers.com/

Click on the chain button

Paste the link from your clipboard

What changes (the green is what you had, the red is what was added)

For a computer, each character counts! One space, a dot... is similar to a character.
And at CL, each line break counts! a keystroke line break is equal to a html BR
As you can tweak the preview file (as shown below for the widths), you can also add any hex code you like and make a palette image with making a real palette!
Palette image previews (this) list the HEX codes in the link - all you have to do is replace the HEX code (click here to see the URL in your browser adressbar

Here I tweaked Wist's palette - kept the width + changed colors with mine + added a border
 >>
>> 
Adding the 'Create Pattern' link
Here's an example, observe and compare at the URLs of the preview file and pattern creator page:

Pattern creator - preview image
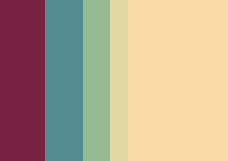
Pattern creator - preview image
FAKE BADGE CODE
Can't add the rating but at least there's the title and creator

>> FAKE BADGE CODE
To put 2 fake badges on a line use this one
>> FAKE BADGE CODE2
CLbadge CLbadge2
How to change the widths of palette preview images
In the above comment how to combine palettes we removed the end of the URL like this
 www.colourlovers.com/paletteImg/FEE64D/D6E568/ADE384/85E19F/

5CE0BB/Calm_Waters.png?cPW=MC4zNSwwLjA1LDAuMDYsMC4wNSwwLjQ5
what was removed at the end
?cPW=MC4zNSwwLjA1LDAuMDYsMC4wNSwwLjQ5
is the information how to display the widths
Simply replace this with the widths of other palettes preview images
For example: I would like to apply the widths of 'Wonder woman palette to theHoli Days palette


PREVIEW IMAGES


Here the width of each palette have been switched - this is the same code as the previews above with the URL endings inverted:


to make things like this:

This is the max colors supported in one file.
The palettes used for the above come from the unicorn rainbow challenge
Say you want to join these palettes
When you open the preview image of a palette you get something like this:
www.colourlovers.com/paletteImg/FEE64D/D6E568/ADE384/85E19F/5CE0BB/Calm_Waters.png?cPW=MC4zNSwwLjA1LDAuMDYsMC4wNSwwLjQ5
The above URL is this: (with size set to style="width:200px;height:40px;" )

Remove the widths
Everything that comes after .png is the widths information - you can remove it - so you now have something like this (that ends with .png):
www.colourlovers.com/paletteImg/FEE64D/D6E568/ADE384/85E19F/5CE0BB/Calm_Waters.png
It should now look like this:

Add more colors
Now let's concentrate on the center part of the URL:
.../paletteImg/FEE64D/D6E568/ADE384/85E19F/5CE0BB/Calm_Waters...
Each slash separates color HEX codes, so all you have to do is add those of the other palette
(I had the yellow and blue and want to add the blue and red, so in this example I need to add the colors AFTER the hex codes)
.../paletteImg/FEE64D/D6E568/ADE384/85E19F/5CE0BB/AED65E/F0CF11/F88222/FD4130/Calm_Waters.png

The file name "Calm_Waters.png" is not important - you can put what ever you like as long as you leave the .png (file extension)
eg. : you can do like this for example
.../paletteImg/FEE64D/D6E568/ADE384/85E19F/5CE0BB/CW.png
MAKING A CLICKABLE VERSION
Note that with the above you cannot link each palette as it is one image file.
If you wish to link, use the same technique as the rug and adjust the widths to make all palette fit on one line
The EMPTY RUG CODE FOR PALETTE says
style="width:100%;height:40px;"
for each image - this means the image is 100% wide and 40px height
to put 2 images each need to be 50% wide (100/2)
to put 3 images each need to be 33.3% wide (100/3)
to put 4 images each need to be 25% wide (100/4)
to put 5 images each need to be 20% wide (100/5)
to put 6 images each need to be 16.66% wide (100/6)
to put 7 images each need to be 14.28% wide (100/7)
to put 8 images each need to be 12.5% wide (100/8)
to put 9 images each need to be 11.1% wide (100/9)
to put 10 images each need to be 10% wide (100/10)
... and so on
example of 5 palettes on a row (click reply to see the code in-between these lines)
===================================
===================================
HOW TO ADD A BORDER TO AN IMAGE
Adding a border is the same kind of information as adding the size, they both go inside :
style=" "
For a 5px wide red border, you write:
style="border: 5px solid #EA664C; "
inside the img tag

The 2nd line shows the code with the size.
Size and border go to the same place,
so you put them side by side separated by a dot-comma (careful!! dot-comma ; nothing else!! not : 2 dots)
and it gives this:

of course, you can change the widths and color as you like
Here's an other example
style="width:70px; border: 10px solid #555555; "
and it gives this:

There's also more border styles!
Instead of solid you can use dotted, dashed, inset, groove... See here for a complete list


Want the default CL border?
The default CL border is a little more sophisticated, it's light grey with a thin dark outline.
This trick only works here at CL - use the CL style default border by adding:
class="photo-border"

and it gives this:

HOW TO ROTATE A CL PALETTE PREVIEW IMAGE
CL has a cool trick, to rotate a CL palette preview images (only palettes not patterns).
at the end, after the '.png' add "&angle="
 Nothing (size set to style="width:50px;height:50px;" )
http://www.colourlovers.com/paletteImg/F0731B/96999A/C.png
 90° rotation &angle=1
 http://www.colourlovers.com/paletteImg/F0731B/96999A/C.png&angle=1
 180° rotation &angle=2
 http://www.colourlovers.com/paletteImg/F0731B/96999A/C.png&angle=2
 270° rotation &angle=3
 http://www.colourlovers.com/paletteImg/F0731B/96999A/C.png&angle=3"
and so on (&angle=4 is the same as &angle=0 )
and this works with the widths


and with other sizes of course


I'm quit sure some find it bothering - I would advise not to abuse. I'm a bad example as I've done it myself - I'll try avoiding it for my items.
See comments here
Animating Palettes & Patterns


1 ) Get several preview images to link together.
2 ) Use one of the online GIF makers to convert them into one GIF file
Each service is a little different - depends what you want to do
I also edit the images off line, like adding some blur, making them slightly darker, lighter for a smoother transition
OR: use an application that enable animations such as gimp, photoshop (from CS4, or image ready for older versions) , flash...
See tutorials at Youtube
Hosting the gif - these online tool appear and disappear quickly, I advise to avoid using the link they may suggest but to download and host your file yourself.
I generally upload the gif file to the pattern page in question. (All these patterns have a gif hosted on their page)
But to upload the gif file to CL, it must be max 150px wide before you upload
You can resize gif files with this online tool
Check out:
In Motion by cstallions

Pattern gifs and a tutorial
How to get a CL avatar image
Easy way:
You can drag avatar images you see in the sidebars (like those here) to your desktop

They are simply embedded images like these below - you can drag and drop these to your desktop:


If you can't find the one you want in a sidebar:
You can extract the avatar image by looking in the page source code
Using Chrome Or Firefox
It's easier if you use Google Chrome's 'inspect element' or Firefox with 'inspect this' add-on..
For Chrome: click on the image and choose "inspect element".
On the bottom left of your window you should see the link to the image file appear:

click to view larger
Other browsers - directly from the source code
Once in front of the page where the avatar is, hit [Ctrl]+[U] (or menu View -> Source Code) to open the source code of the page
Search for the lover's name of the avatar you want.
You're looking for the lover's link close to:
class="avatar"
Just after the above, you should see something like:
background-image: url(http://static.colourlovers.com/images/lovers/380/380633t.jpg?1310893049);
http://static.colourlovers.com/images/lovers/380/380633t.jpg?1310893049
is the link to the avatar image. Open the link and you should see the avatar file you can save (drag to your desktop and save it somewhere - eg on a colour page as mentioned above)
Tutorials & Links
> > About Seamless & Bugs>> How to add tags - Why add tags+About tags
>> How to insert & resize an image
>>HOW TO COMBINE PATTERN + PALETTE
>> HOW TO MAKE RUGS & COLOURED TEXT PALETTES
>> PHOTOCOPA
>>COPASO : combine palettes, keep widths...
>>Using COPASO to search (for 1 Lover Color Palettes)
>> New Youtube video format: how to embed (and VIMEO)
>> how to update the IF badge code
>> About combining colors - gradient
SEE COMPLETE INDEX OF TUTORIALS
>> Help Screenhots( page areas to look out and more)
>> CL tools & Links



HOW TO: IMAGES, BADGES, PATTERN PREVIEWS...
NB: If you don't know HTML, please check out MUST KNOW HTML BASICS - it's short & can avoid you a lot of hassle later
>> How to download and where to upload the copy of an image
>> How to embed an image
>> How to resize an image
>> How to add a link to an image or text
>> How to put 2 badges on the same line
>> How to make a palette image without making a real one
>> How to change the widths of palette preview images
>> How to combine several palettes into one file - how to make it click able with links to each palette
>> How to add borders (frames to an image)
>> How To Rotate a Palette Preview Image
>> Animating Palettes & Patterns
>> How To extract colours from an image
>> How To get an avatar
>> Links to Other Tutorials
See also:
Step by step how to post photocopa images to groups
>> BACK TO INDEX of TUTORIALS
Other BUSTED USING AN IMAGE!